通常我们一般编辑代码或者编写文档是在
windows上,而编译,构建都是在虚拟机上获取远程的设备上,但是有时候需要将本地的串口设备映射到远端的ubuntu系统,以便可以实机调试。比如KGDB,所以我们可以通过网络转发串口数据,又在本地接受数据,并生成虚拟的串口。 这里有两种方案:
- 在
Window上使用Cygwin执行socat,以及在Linux上使用socat进行传输。- 在
Windows上使用com2tcp,然后在Linux上使用socat
方法1
在windows和ubuntu上使用socat进行映射,我们可以使用Cygwin在win上下载socat。
安装socat
Window
下载Cygwin: 


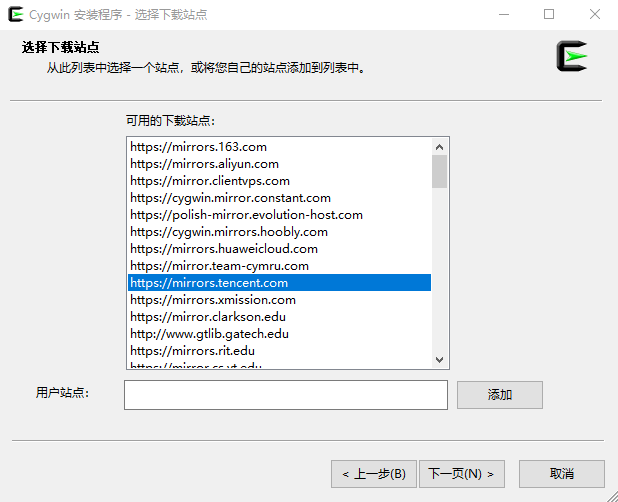

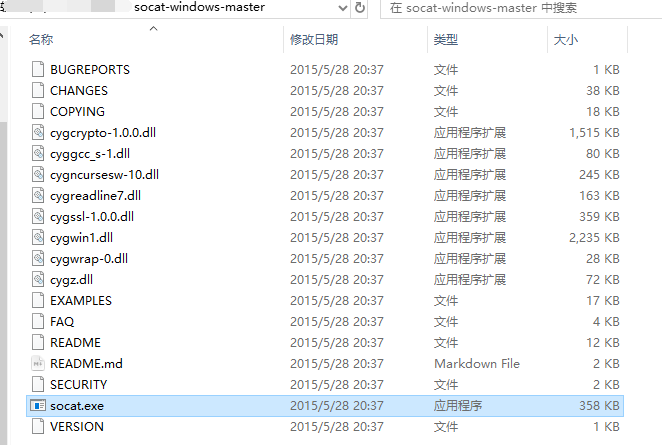
 下载会很慢,不建议安装。 我们直接去socat-for-windows下载:
Linux
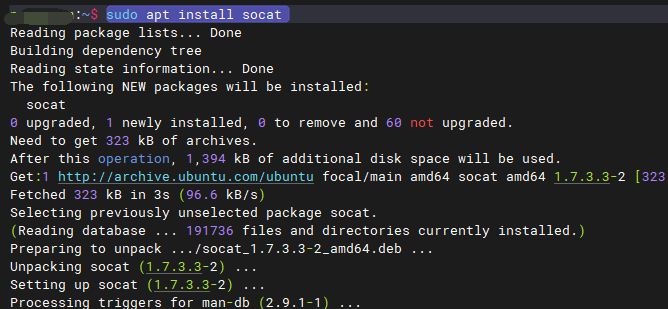
这里是Ubuntu
sudo apt install socat
构建映射
这里我们是想将本地的串口(
Windows)映射到远端的ubuntu上。
我们在Windows(管理员权限)上执行:
cd <socat> 软件位置;或者加入Path
socat COM8,b115200,raw TCP-LISTEN:1234,reuseaddr
方法2(推荐)
Windows安装软件
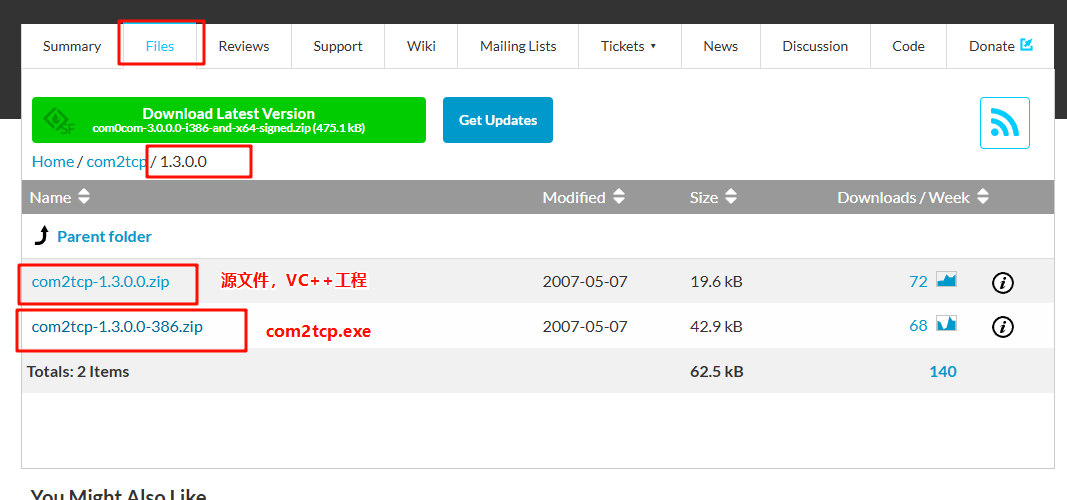
我们需要下载com2tcp软件,地址:https://sourceforge.net/projects/com0com/files/com2tcp/1.3.0.0/ 当然它的源码也是公开的:
https://sourceforge.net/projects/com0com/files/
https://github.com/tanvir-ahmed-m4/com2tcp/tree/master


 当然我们也可以下载
com2com来作为一个测试,创建虚拟串口对。
ubuntu安装
sudo apt install socat构建映射
这里的设备情况如下: 
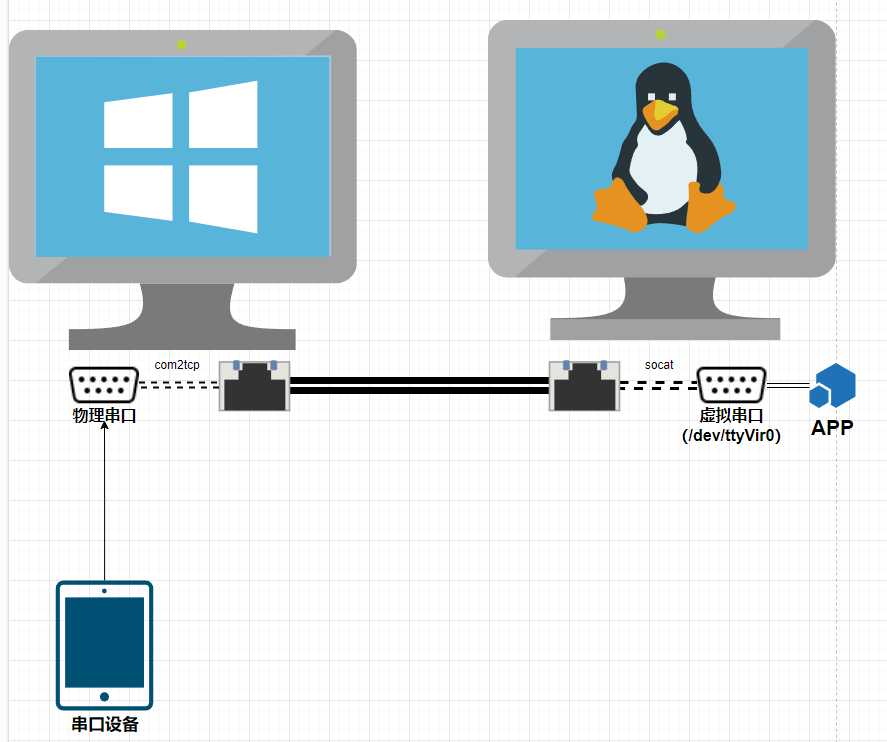 在这里,我们希望将
Windows下的物理串口,通过网络映射到Linux系统上的虚拟串口。这样,我们在Linux上使用串口如同使用物理串口一样。
Windows
我们打开power shell,然后进入到com2tcp.exe目录,接着执行:
# 我这里的物理串口是com3
.\com2tcp.exe --telnet --baud 115200 --ignore-dsr  \\.\COM3 8887

# --telnet:协议类型
# --baud: 设置波特率
# --ignore-dsr
# \\.\COM3:windows下的串口路径名称
# 8887:表示服务端监听的端口--ignore-dsr并不出现在帮助中,但是可以查看源码得到: 
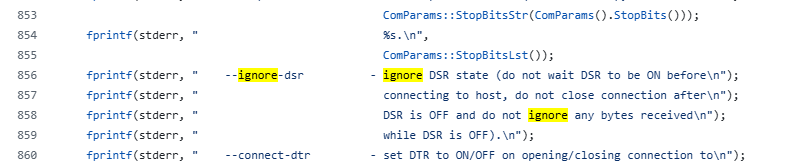 这里如果不加入该选项,会时常报错,无法正确执行。 我们可以使用
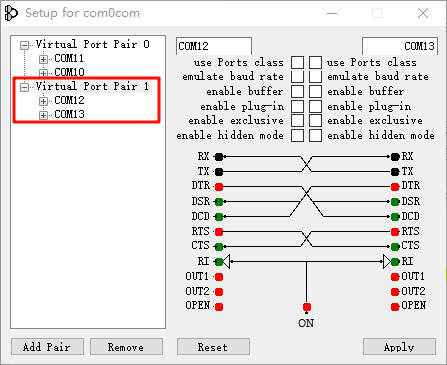
com2com创建一对串口进行测试: 
 接着在开启一个
power shell执行:
# 客户端,加入了IP地址,则会自动创建客户端
.\com2tcp.exe --telnet --baud 115200 \\.\COM12 127.0.0.1 8887然后我们使用串口助手打开COM13: 
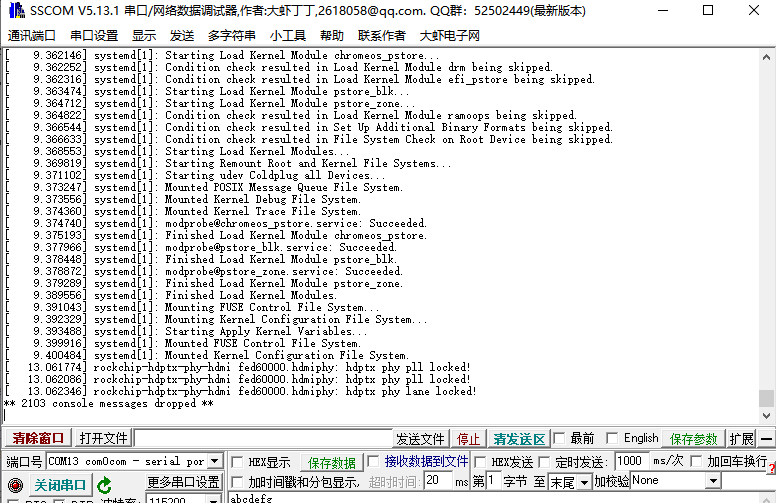 如果可以看到数据则表示成功。我们退出该测试的链接,不然会影响后面操作。
Linux
我们开启一个终端,然后执行如下命令:
# 先测试下,IP为Windows机器的
telnet 192.168.1.xxx 8887我们会正常连接,接着我们退出(CTRL+])。 
 接着我们使用
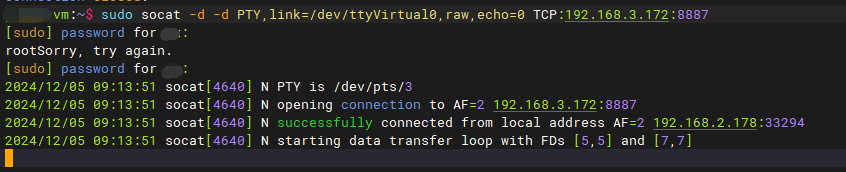
socat将TCP链接绑定到一个虚拟串口上:
sudo socat -d -d PTY,link=/dev/ttyVirtual0,raw,echo=0 TCP:192.168.3.xxx:8887
 我们可以看到在
/dev下有ttyVirtual0: 
 接着,我们来使用它:
sudo minicom -D /dev/ttyVirtual0 -b 115200
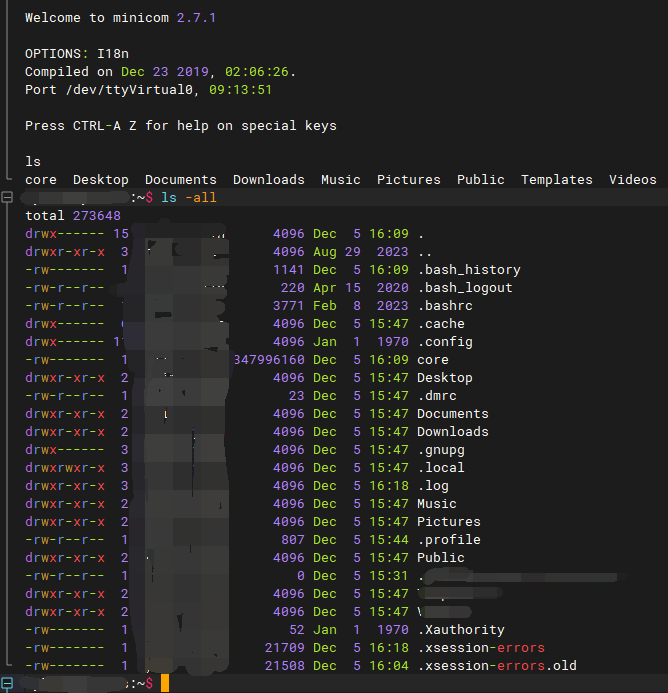
minicom可以按CTRL+A然后按下Z进入菜单,然后按X退出,在提示YES/NO,选择YES,Enter退出。
这样,远端的设备也可以使用KGDB通过本地串口调试设备了。
附件
服务
这里提供一个
Linux服务,用来启动设备上的串口映射,间隔10s检查是否在指定IP以及端口出现了服务端(com2tcp),如果存在的话自动创建/dev/ttyVirtual0串口。
- 我们先创建
deb目录
mkdir -p my-socat-service/{DEBIAN,usr/local/bin,etc/systemd/system}- 接着我们准备主要程序
my-socat-service/usr/local/bin/check_and_run_socat.sh
#!/bin/bash

CONFIG_FILE="/etc/check_and_run_socat.conf"
DEFAULT_IP="192.168.1.177"
DEFAULT_PORT=8887
DEFAULT_VIRTUAL_PORT="/dev/ttyVirtual0"
CHECK_INTERVAL=10
SCRIPT_NAME=$(basename "$0")

# 读取配置文件
if [ -f "$CONFIG_FILE" ]; then
  source "$CONFIG_FILE"
else
  echo "[$(date)] 配置文件未找到,使用默认值"
  TARGET_IP=$DEFAULT_IP
  TARGET_PORT=$DEFAULT_PORT
  VIRTUAL_PORT=$DEFAULT_VIRTUAL_PORT
fi

# 检查是否已有同名脚本运行
if pgrep -f "$SCRIPT_NAME" | grep -v $$ > /dev/null; then
  echo "[$(date)] 检测脚本已在运行,退出"
  exit 1
fi

echo "[$(date)] 脚本启动,PID $$"

# 捕获退出信号
cleanup() {
  echo "[$(date)] 脚本退出"
  exit 0
}
trap cleanup SIGINT SIGTERM

while true; do
  # 检查是否可以连接
  nc -z "$TARGET_IP" "$TARGET_PORT"
  if [ $? -eq 0 ]; then
    echo -e "[$(date)] $TARGET_IP:$TARGET_PORT \e[32m可连接\e[0m,启动 socat 命令,虚拟串口位置:$VIRTUAL_PORT"
    sudo socat -d -d PTY,link=$VIRTUAL_PORT,raw,echo=0 TCP:$TARGET_IP:$TARGET_PORT
  else
    echo -e "[$(date)] $TARGET_IP:$TARGET_PORT \e[31m不可连接\e[0m,等待 $CHECK_INTERVAL 秒"
  fi
  sleep $CHECK_INTERVAL
done
接着我们赋予执行权限:
chmod +x my-socat-service/usr/local/bin/check_and_run_socat.sh- 然后添加
systemd服务文件my-socat-service/etc/systemd/system/check_and_run_socat.service:
[Unit]
Description=Check TCP Connection and Run Socat
After=network.target

[Service]
ExecStart=/usr/local/bin/check_and_run_socat.sh
Restart=always
User=root

[Install]
WantedBy=multi-user.target- 添加
DEBIAN控制文件,创建my-socat-service/DEBIAN/control文件,描述安装包信息:
Package: my-socat-service
Version: 1.0
Section: utils
Priority: optional
Architecture: all
Maintainer: Your Name <your.email@example.com>
Description: A service to check TCP connection and run socat- 添加安装/卸载脚本(可选),安装后自动启动服务,创建
my-socat-service/DEBIAN/postinst文件:
#!/bin/bash

# 确保配置文件存在
if [ ! -f /etc/check_and_run_socat.conf ]; then
  cp /usr/local/share/check_and_run_socat.conf /etc/check_and_run_socat.conf
  echo "[$(date)] 默认配置文件已创建:/etc/check_and_run_socat.conf"
fi

# 启动服务
systemctl daemon-reload
systemctl enable check_and_run_socat.service
systemctl start check_and_run_socat.service
赋予执行权限:
chmod +x my-socat-service/DEBIAN/postinst- 卸载时停止服务,我们创建
my-socat-service/DEBIAN/prerm:
#!/bin/bash
systemctl stop check_and_run_socat.service
systemctl disable check_and_run_socat.service
赋予可执行权限:
chmod +x my-socat-service/DEBIAN/prerm- 编译配置文件
/etc/check_and_run_socat.conf:
# 默认目标 IP 地址
TARGET_IP="192.168.1.155"

# 默认目标端口
TARGET_PORT=8899

# 虚拟串口位置
VIRTUAL_PORT="/dev/ttyVirtual0"- 打包
.deb文件
dpkg-deb --build my-socat-service- 安装/测试
# 安装
sudo dpkg -i my-socat-service.deb

# 查看状态
sudo systemctl status check_and_run_socat.service

# 卸载
sudo dpkg -r my-socat-service

# 修改服务信息后重载服务
sudo systemctl daemon-reload
sudo systemctl enable check_and_run_socat.service

# 启动、停止
sudo systemctl start check_and_run_socat.service
sudo systemctl stop check_and_run_socat.service

# 重启
sudo systemctl daemon-reload
sudo systemctl restart check_and_run_socat.service
参考
https://blog.csdn.net/csaaa2005/article/details/123148422https://blog.csdn.net/qq_30068487/article/details/80089803https://blog.csdn.net/csaaa2005/article/details/123148422https://blog.51cto.com/xuxueliang/1358657https://com0com.sourceforge.net/doc/UsingCom0com.pdfhttps://gist.github.com/ssz360/696a5397003562156f62a556d29d961fhttps://sourceforge.net/projects/com0com/
贡献者
 Px
Px